Connecting Apps to Your Agent
Now that you have your agent, the next step is to connect apps so it can interact with the tools you use. Apps allow your agent to perform tasks like sending emails, managing spreadsheets, or posting messages in Slack.
For more details on the App Marketplace and app types, see the App Integration Guide.
The app settings below are specific to Mailgun, but similar principles apply to other apps. Always follow the app’s documentation or the setup instructions in the App Marketplace when connecting a different app.
Permissions and Controls
- Human-in-the-Loop: Require approval for sensitive operations
- App Restrictions: Control which apps the agent can access
- Tool Limitations: Restrict specific tools or capabilities
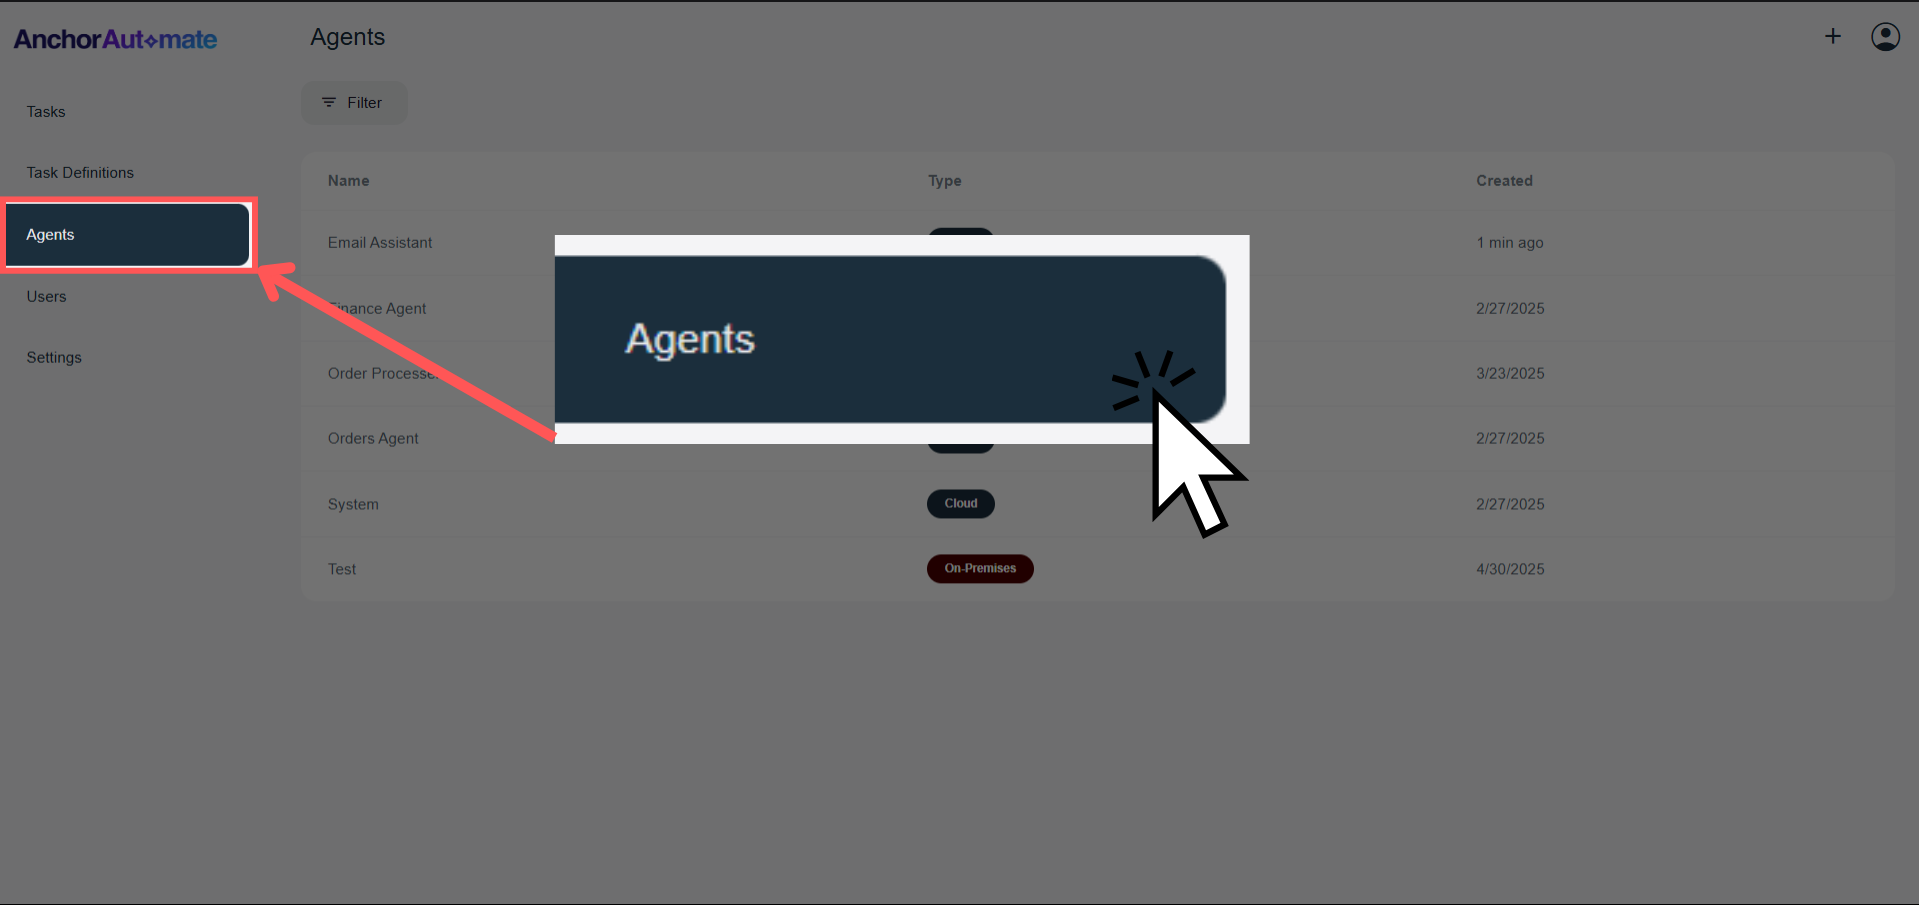
1. Navigate to Your Agent
Step 1: Open the Agent Page
From the homepage/dashboard, click Agents on the sidebar to see a list of your agents.
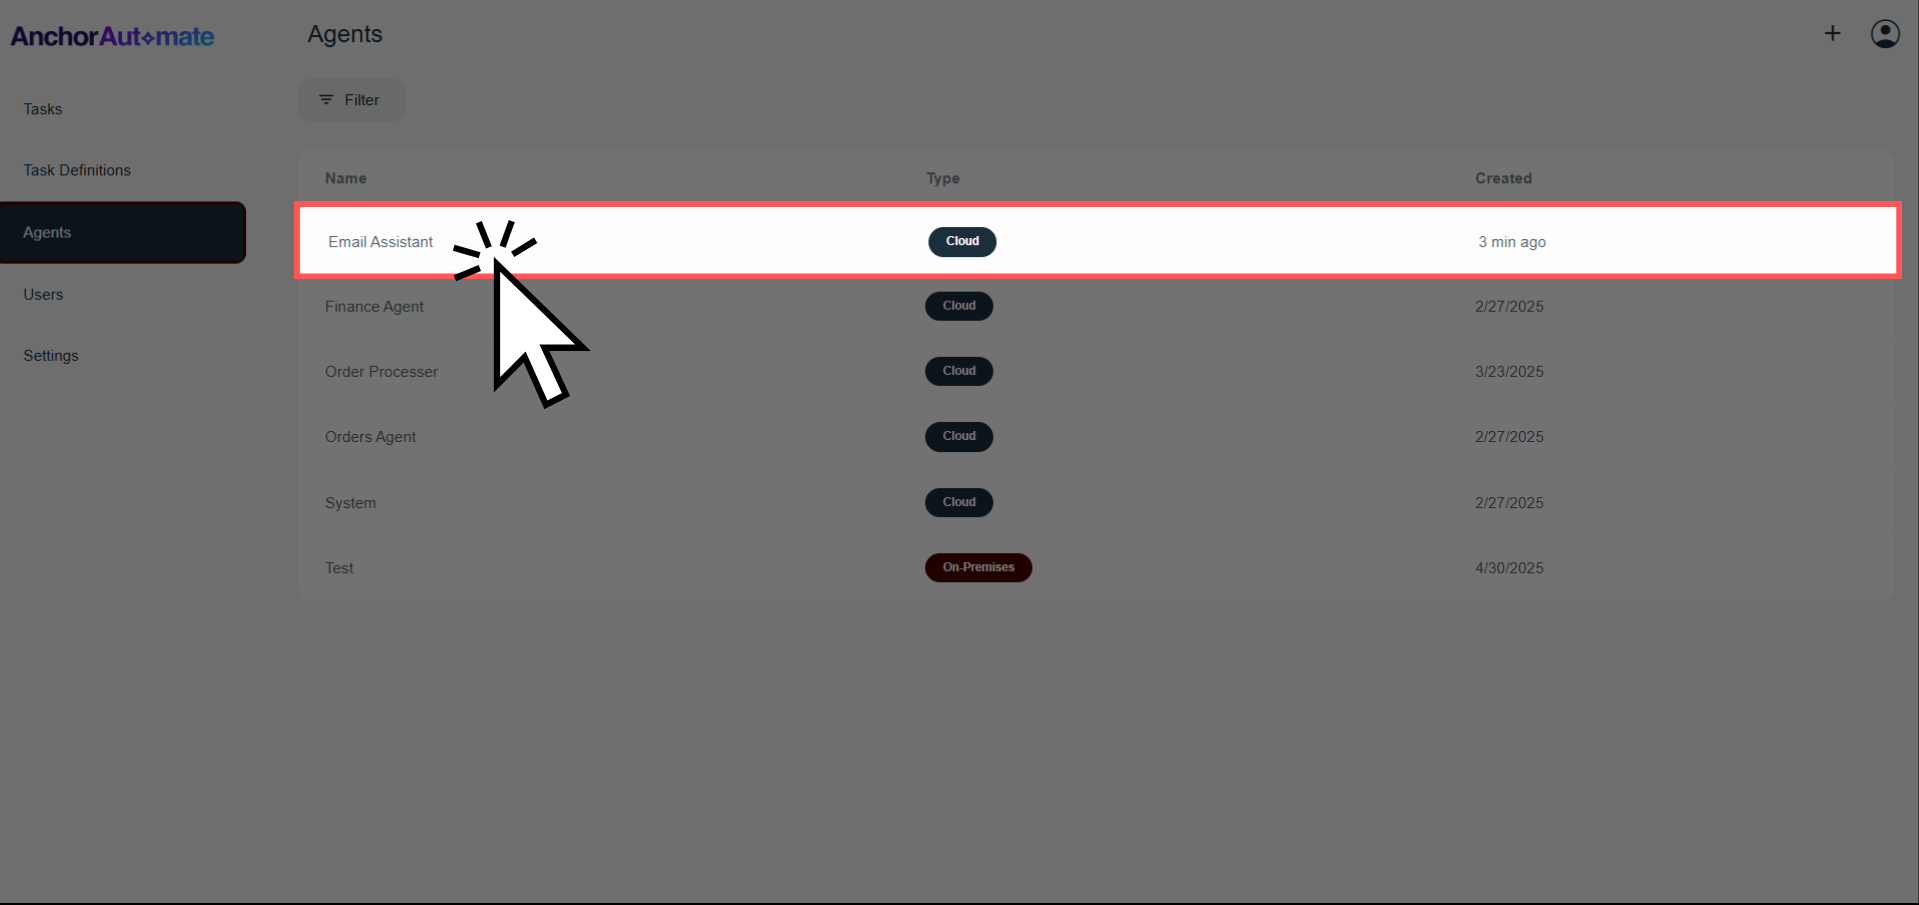
Step 2: Select Your Agent
Click the agent you just created—or any agent you prefer—to open its details page.
2. Add an App
Step 3: Click "Add App"
In the Connected Apps section of your agent page, click "+ Add App".
App Connections
Agents can connect to multiple applications:
- Marketplace Apps: Pre-built integrations with popular services
- Custom Apps: Your own MCP-based integrations
Multiple instances of the same apps can be connected with different configurations

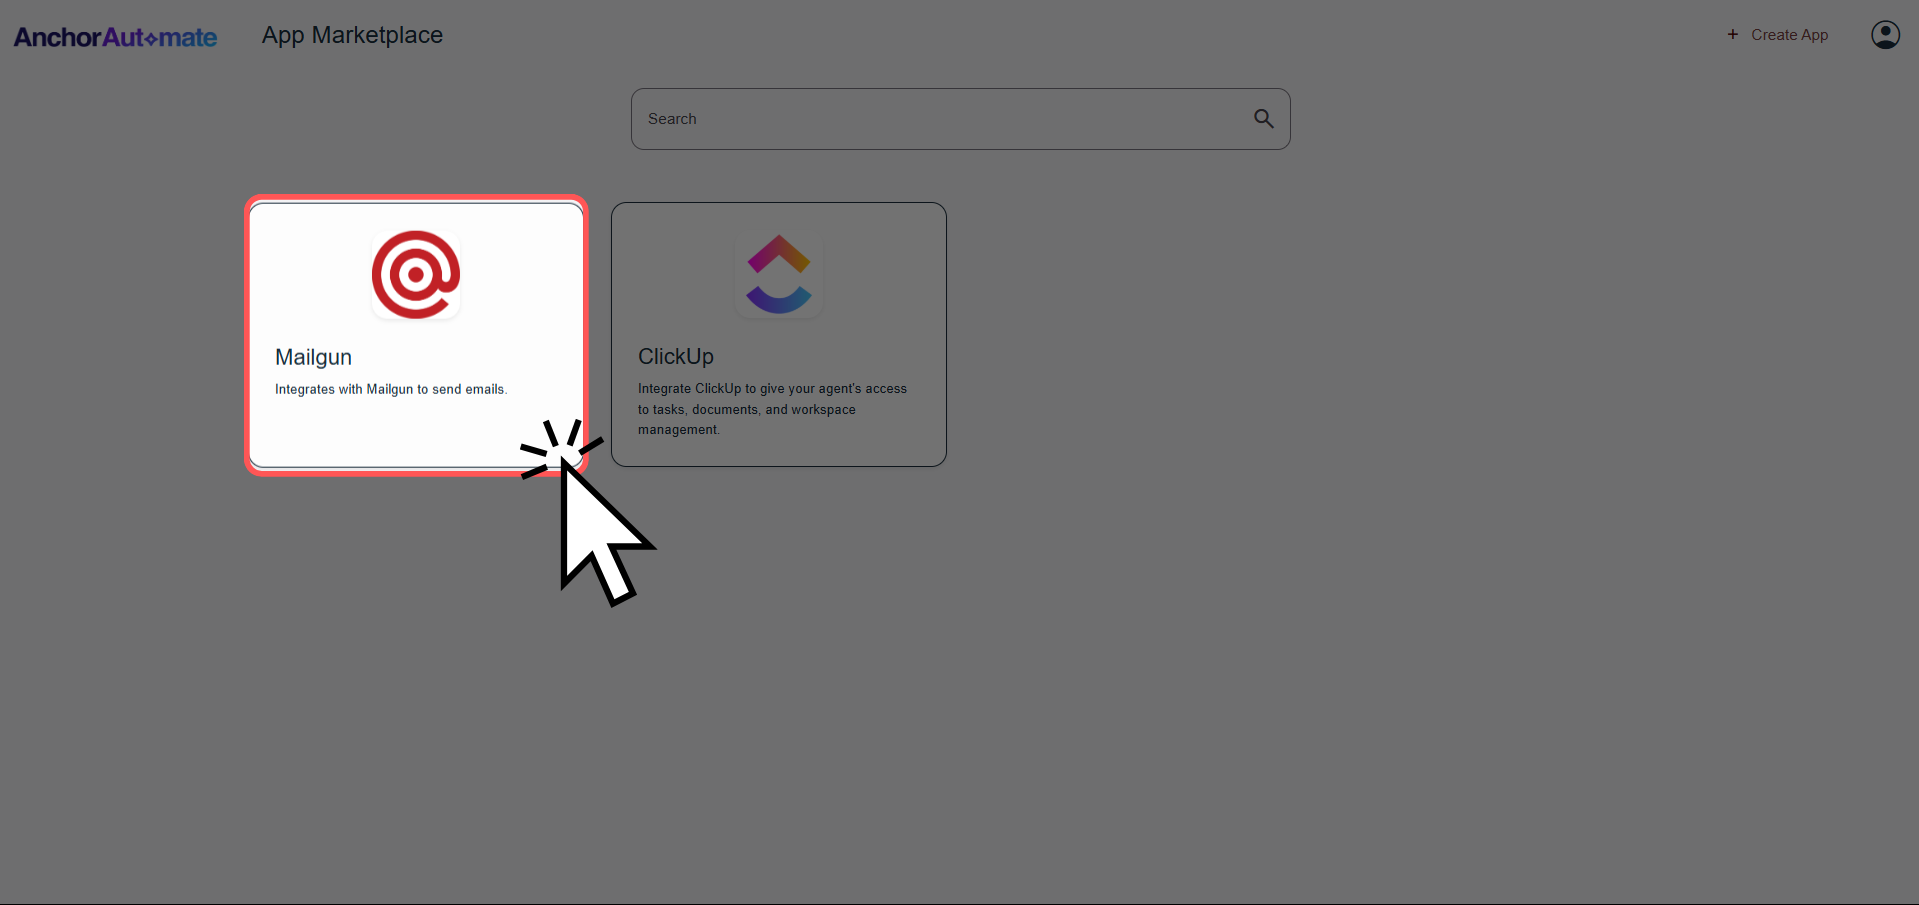
Step 4: Explore the Marketplace
You’ll be redirected to the App Marketplace, where all available apps are displayed. Here, you can browse, search, and select apps your agent can use.

For this guide, we’ll use Mailgun as an example. Click on Mailgun to proceed with connecting it to your agent.
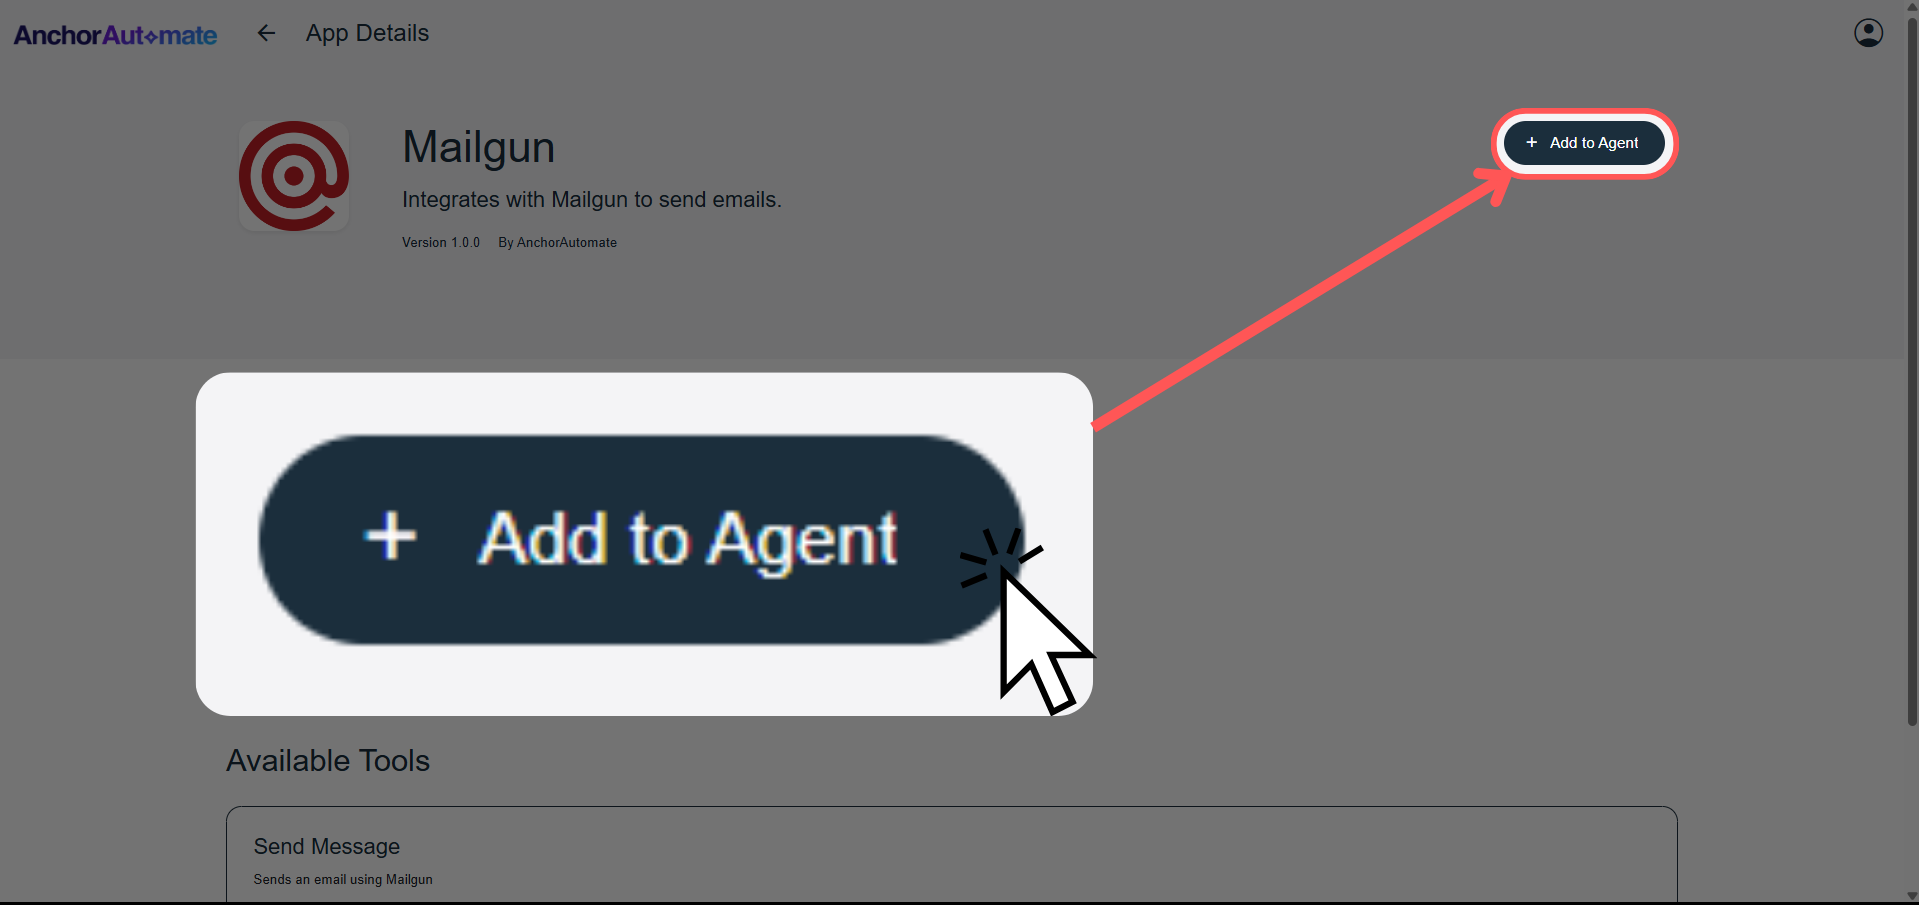
Step 5: Add the App to Your Agent
On the app page, click "Add to Agent".
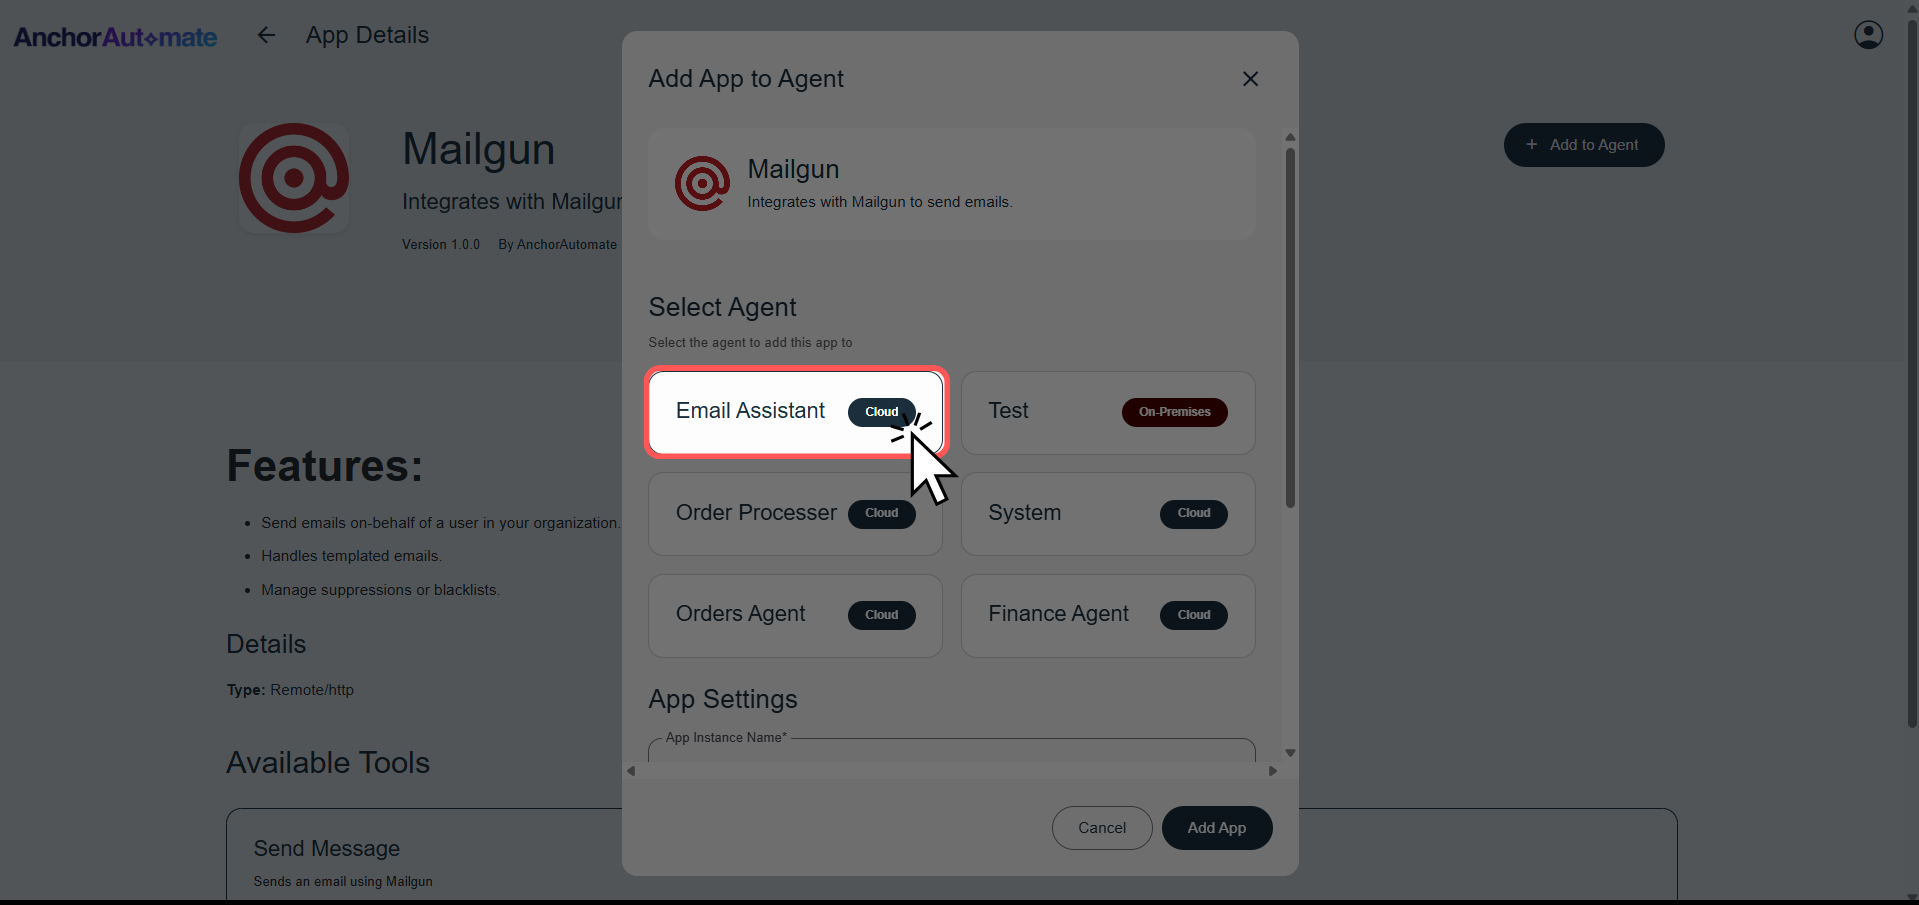
Step 6: Configure App
A dialog will appear with two sections:
-
Select Agent – Choose the agent that will use this app. For our example, select Email Assistant.
-
App Settings – Fill in the required fields. Each field configures how your agent will interact with the app:
| Field | Description | Example Value |
|---|---|---|
| App Instance Name | A custom name for this app connection. This helps you identify the app if you add it multiple times with different configurations. | My Mailgun Account |
| API Key | The key used to authenticate your agent with the app. Ensures secure communication between the agent and the app. | key-xxxxxxxxxxxx |
| Domain | Your registered domain for the app (e.g., Mailgun). Specifies which domain the agent will use when sending emails. | example.com |
| Email Address | The email address the agent will use as the sender for outgoing messages. Helps recipients identify the source of the emails. | noreply@example.com |
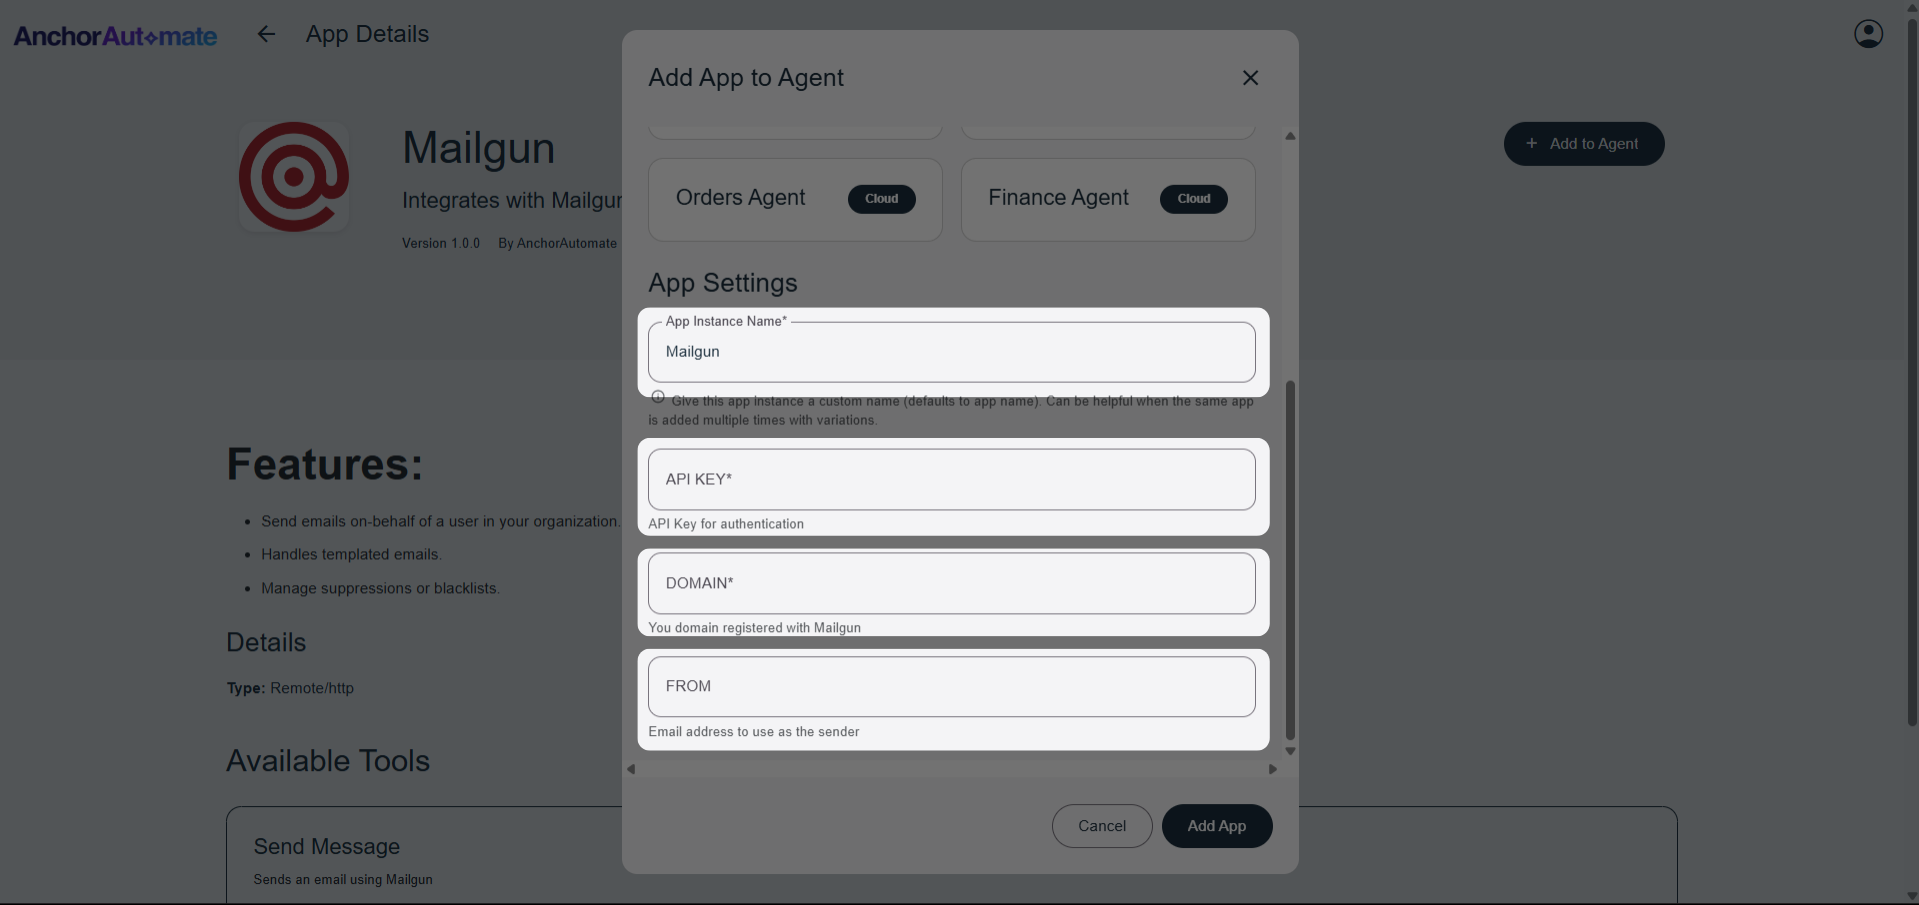
The app settings above are specific to Mailgun, but similar principles apply to other apps. Always follow the app’s documentation or the setup instructions in the App Marketplace when connecting a different app.
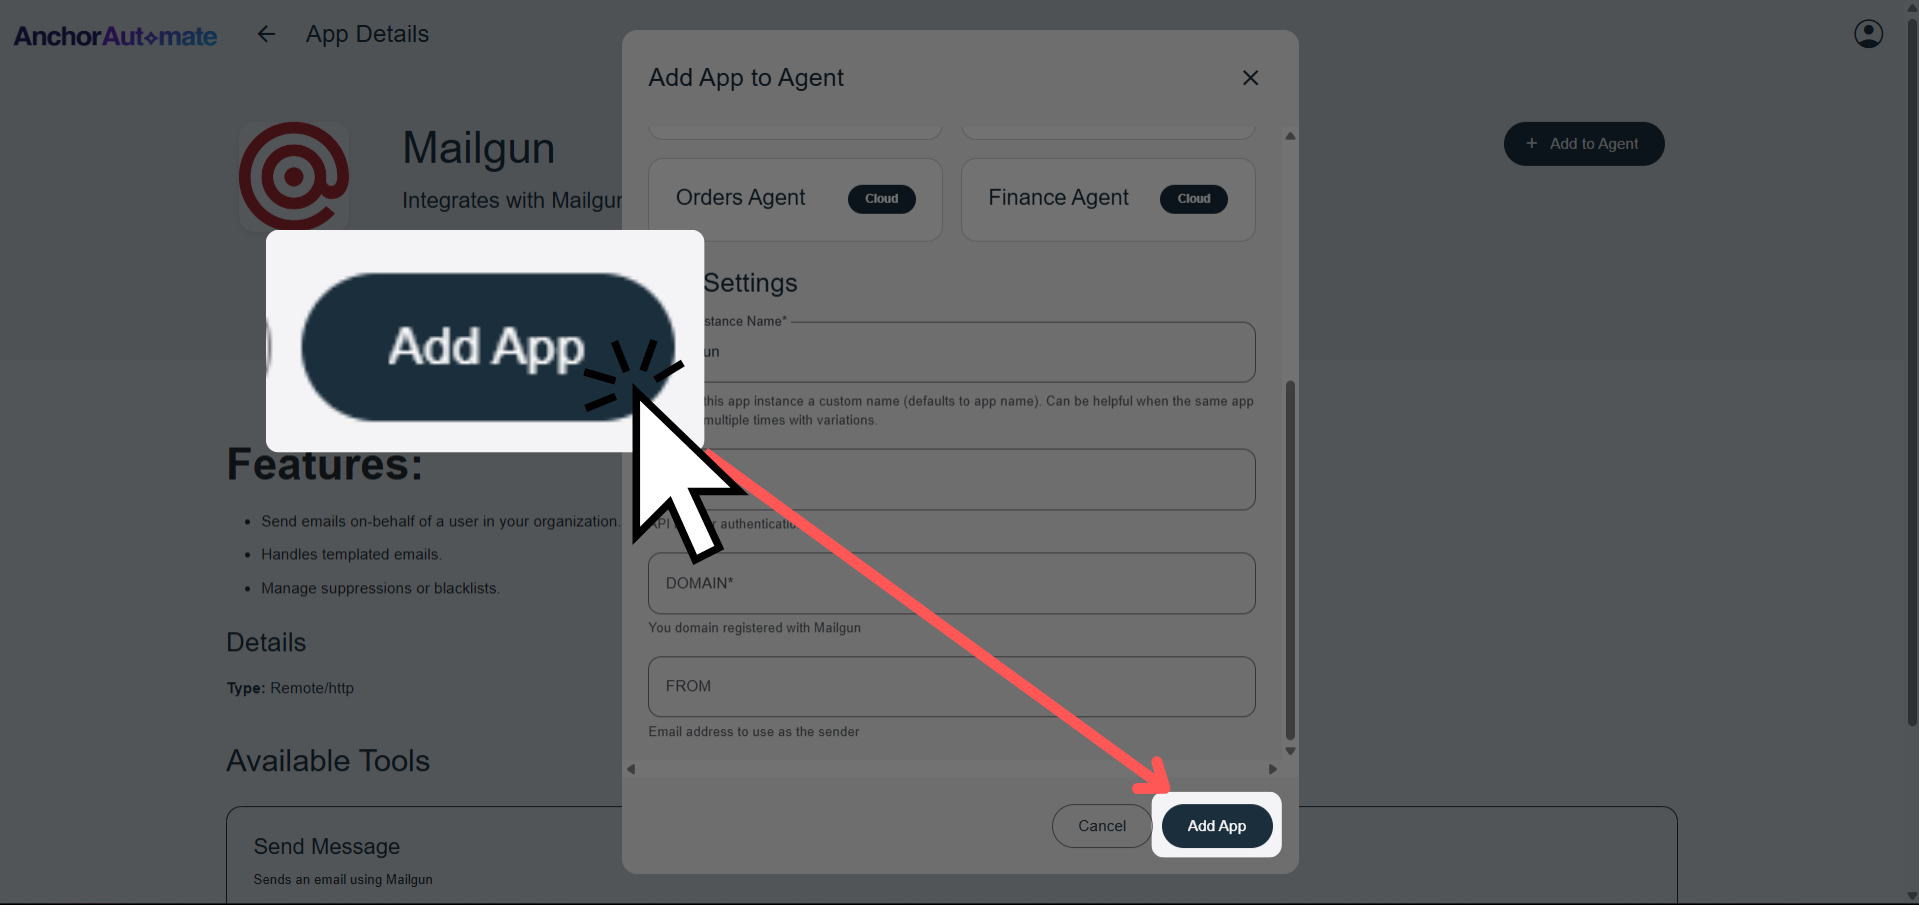
Step 7: Connect the App
Click Add App. 🎉 Congratulations! Your app is now connected to your agent and ready for automation.
Next Step: Creating a Task Definition
After connecting your apps, the next step is to define what tasks your agent should perform. Learn how to create a task definition in the Task Definition Guide.
