Creating Your First Agent
An Agent in AnchorAutomate is an AI-powered assistant that can perform tasks on your behalf, interact with connected apps, and help automate workflows. Think of it as your personal automation helper that can execute tasks like sending emails, managing files, or running custom processes based on your instructions.
For a more detailed explanation of what an Agent can do and how it works, check out the Agent Overview page.
Prerequisites
Before creating an agent, ensure you have:
- An active AnchorAutomate account
- Access to your dashboard
- A clear understanding of the tasks you want to automate
Step-by-Step Guide
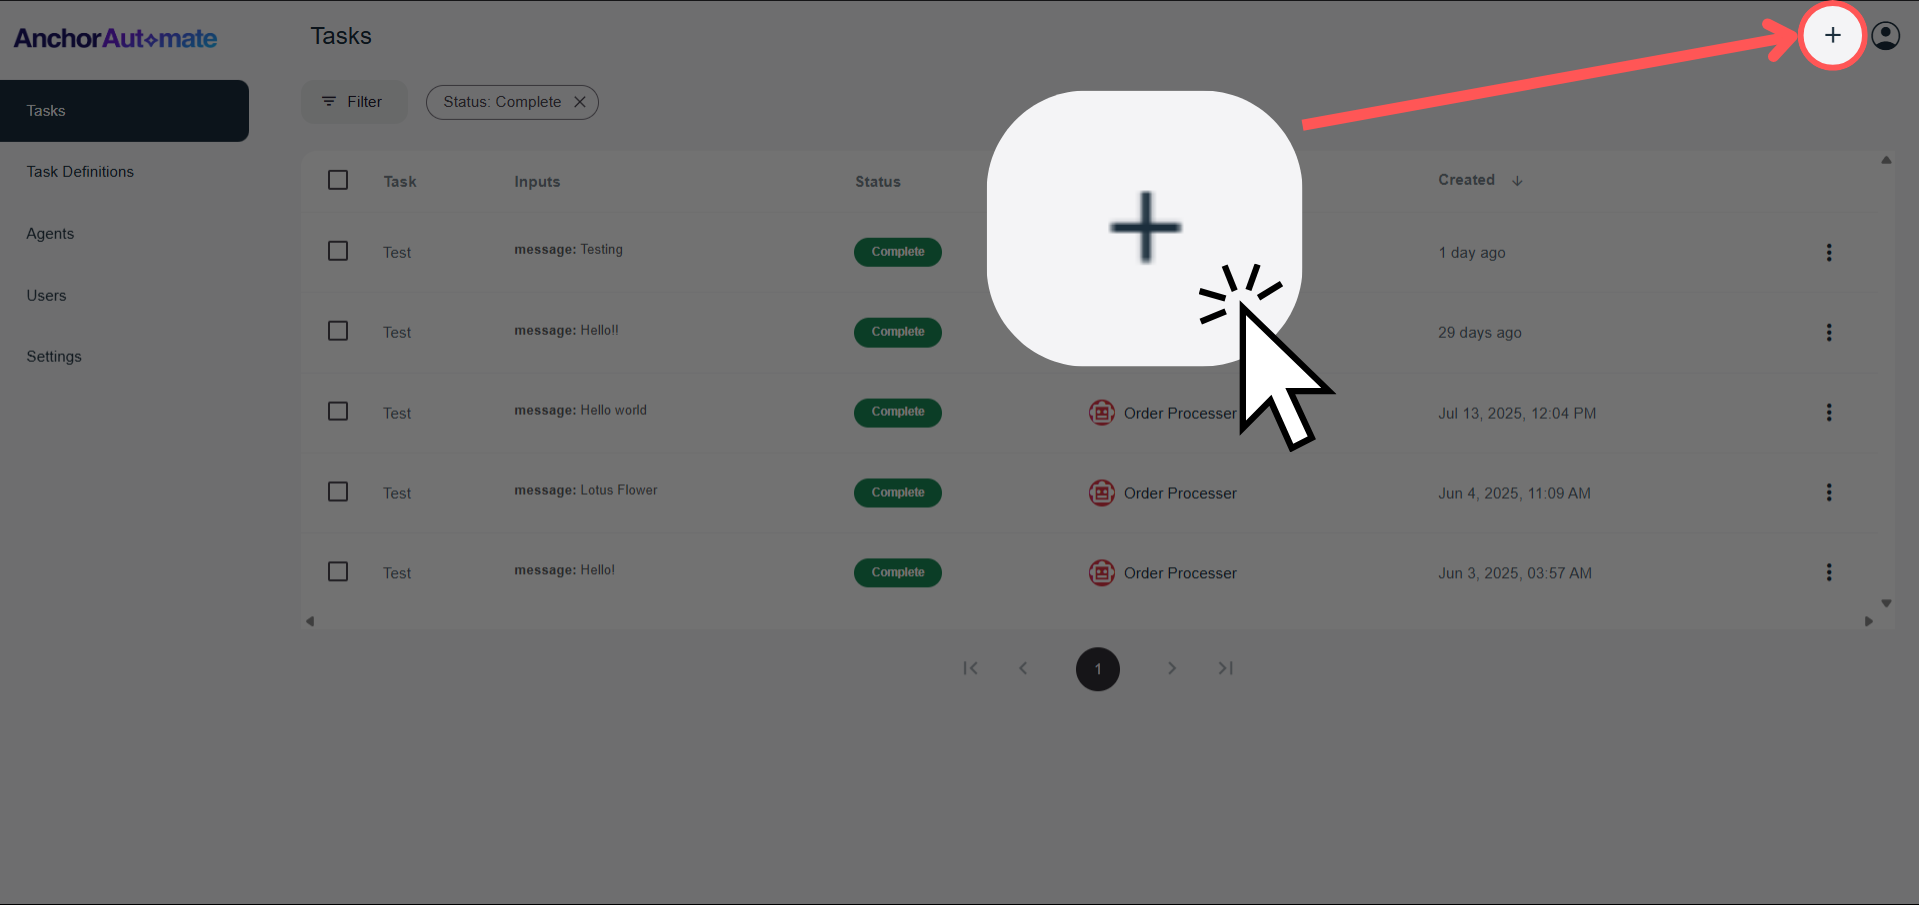
Step 1: Click the Plus Icon
On the home screen or dashboard, click the "+" icon at the top right corner of the screen.
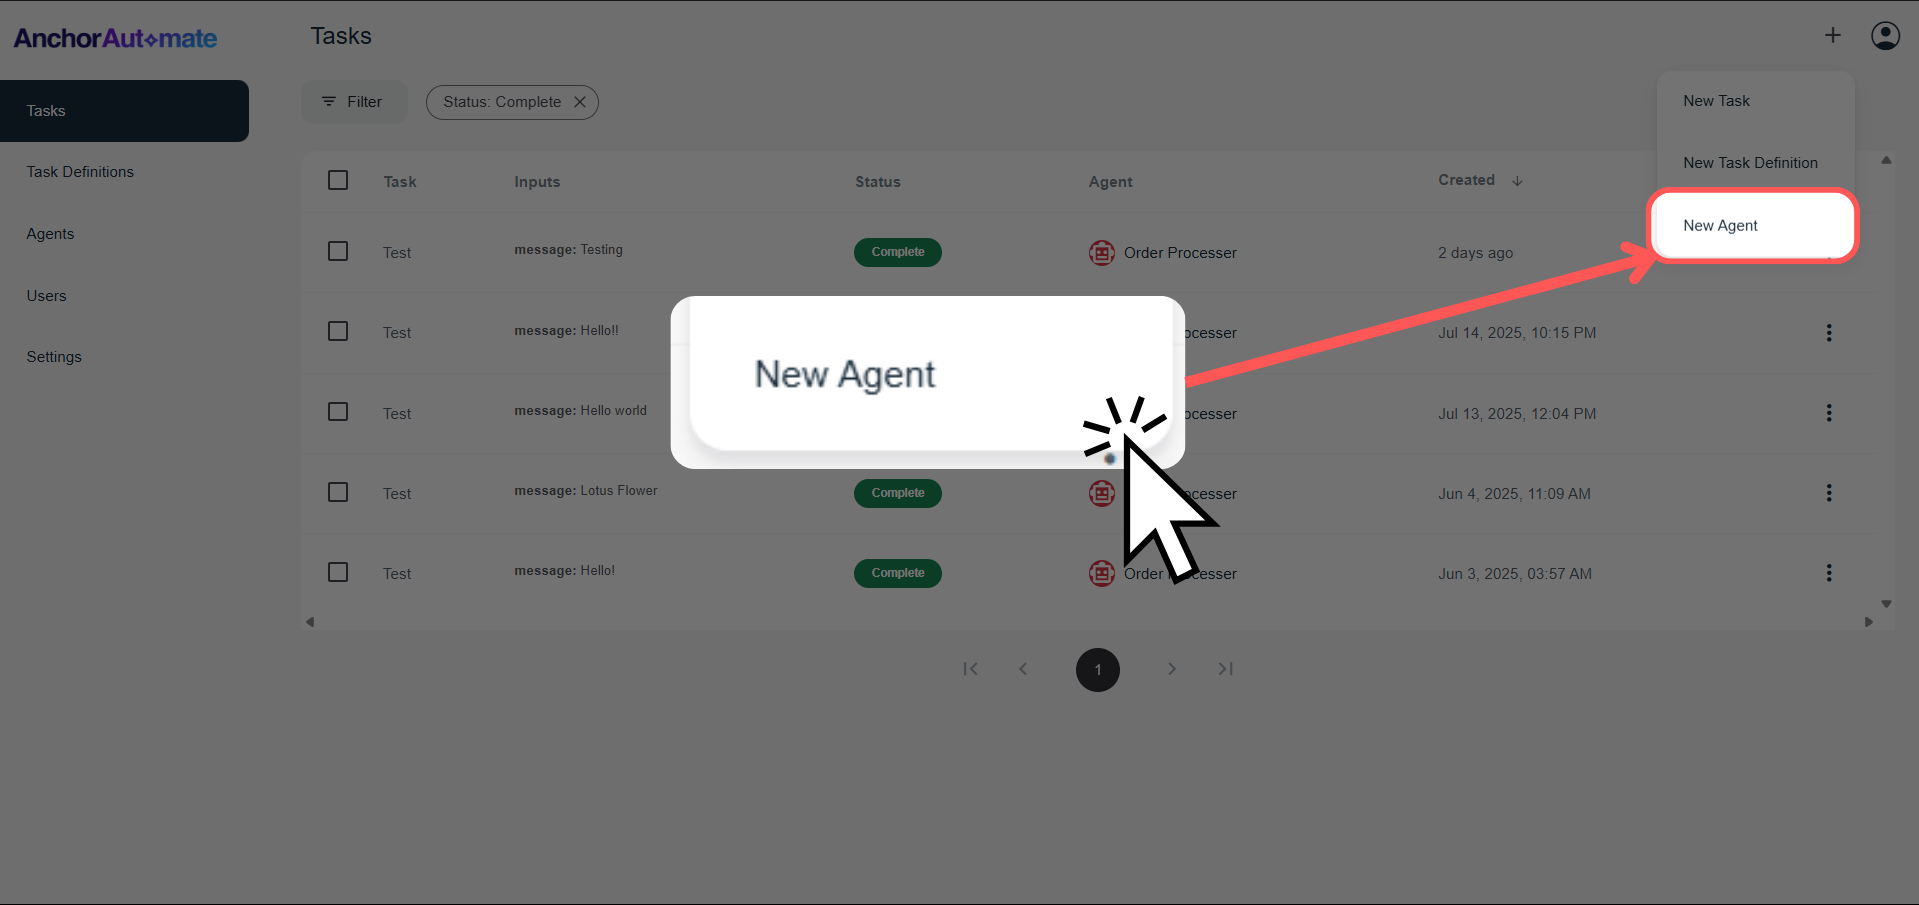
Step 2: Select "New Agent"
After clicking the plus icon, a dropdown menu will appear. Select "New Agent" from the options.
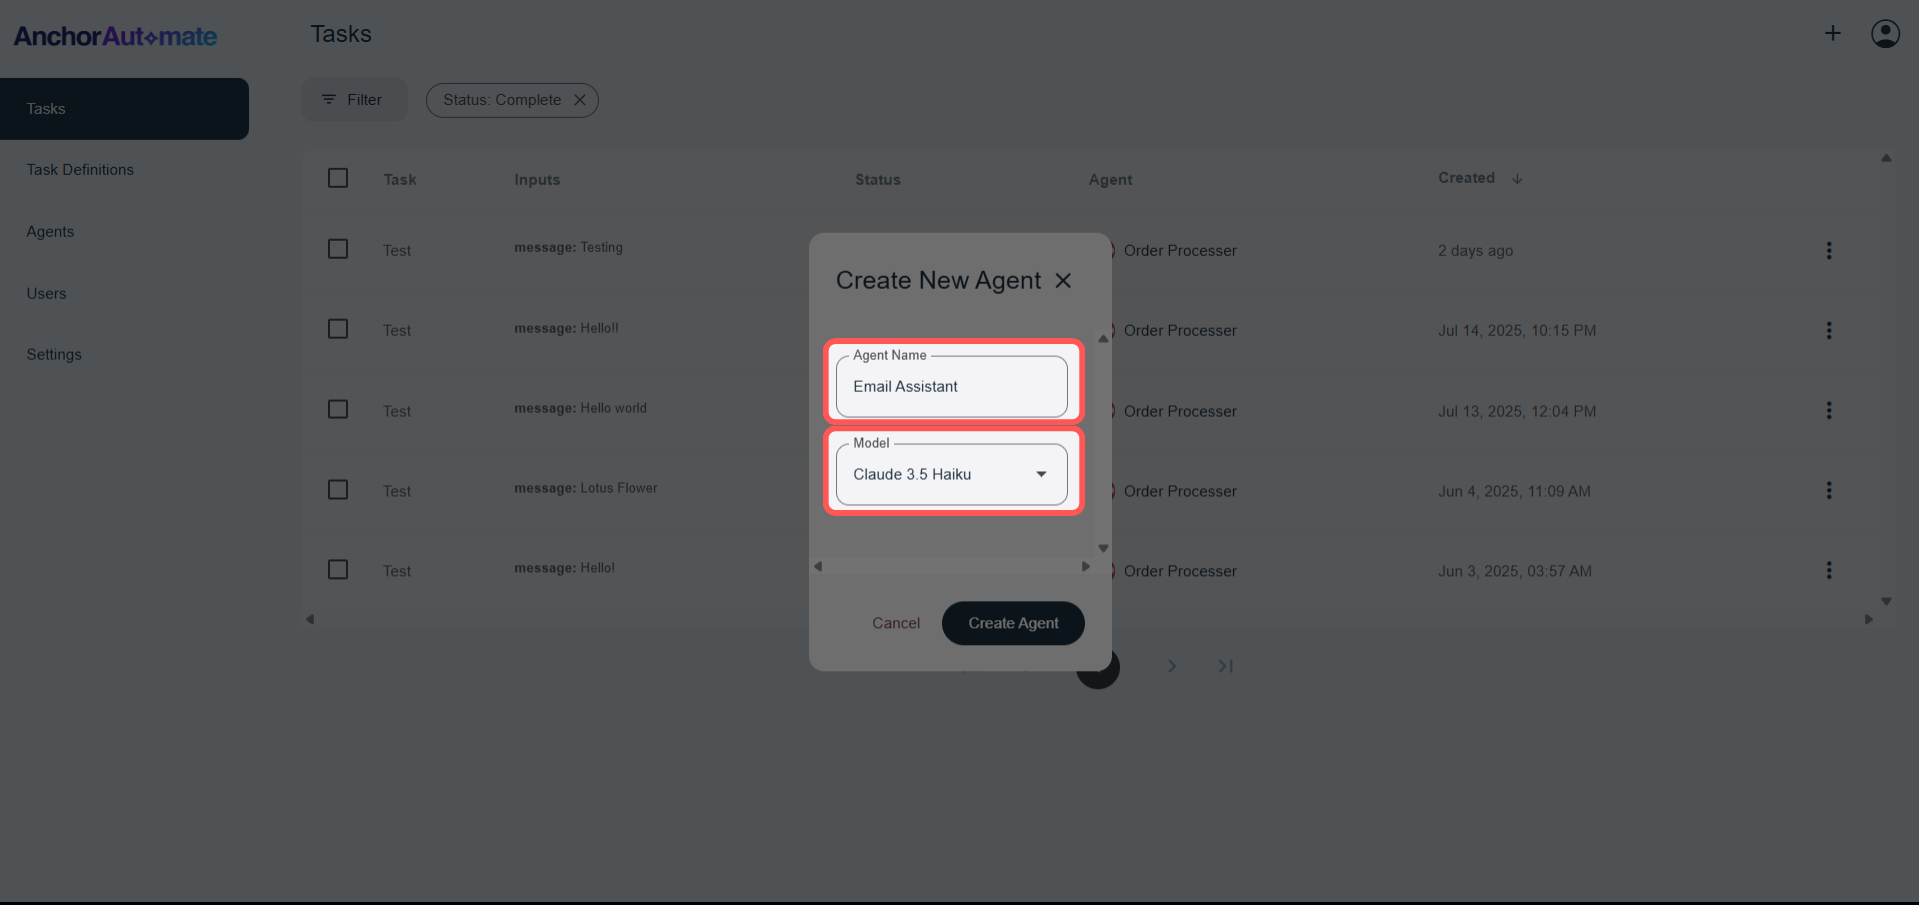
Step 3: Fill Out the Agent Form
A dialog form will appear. Fill in the following fields:
- Name – A friendly, descriptive name for your agent (e.g., "Email Assistant")
- Model – Choose which AI model your agent will use. Different models may produce slightly different outputs depending on your workflow
Here’s an example for guidance:
| Field | Example Value | Description |
|---|---|---|
| Name | Email Assistant | A descriptive name for your agent |
| Model | Claude 3.5 Haiku | The AI model your agent will use |
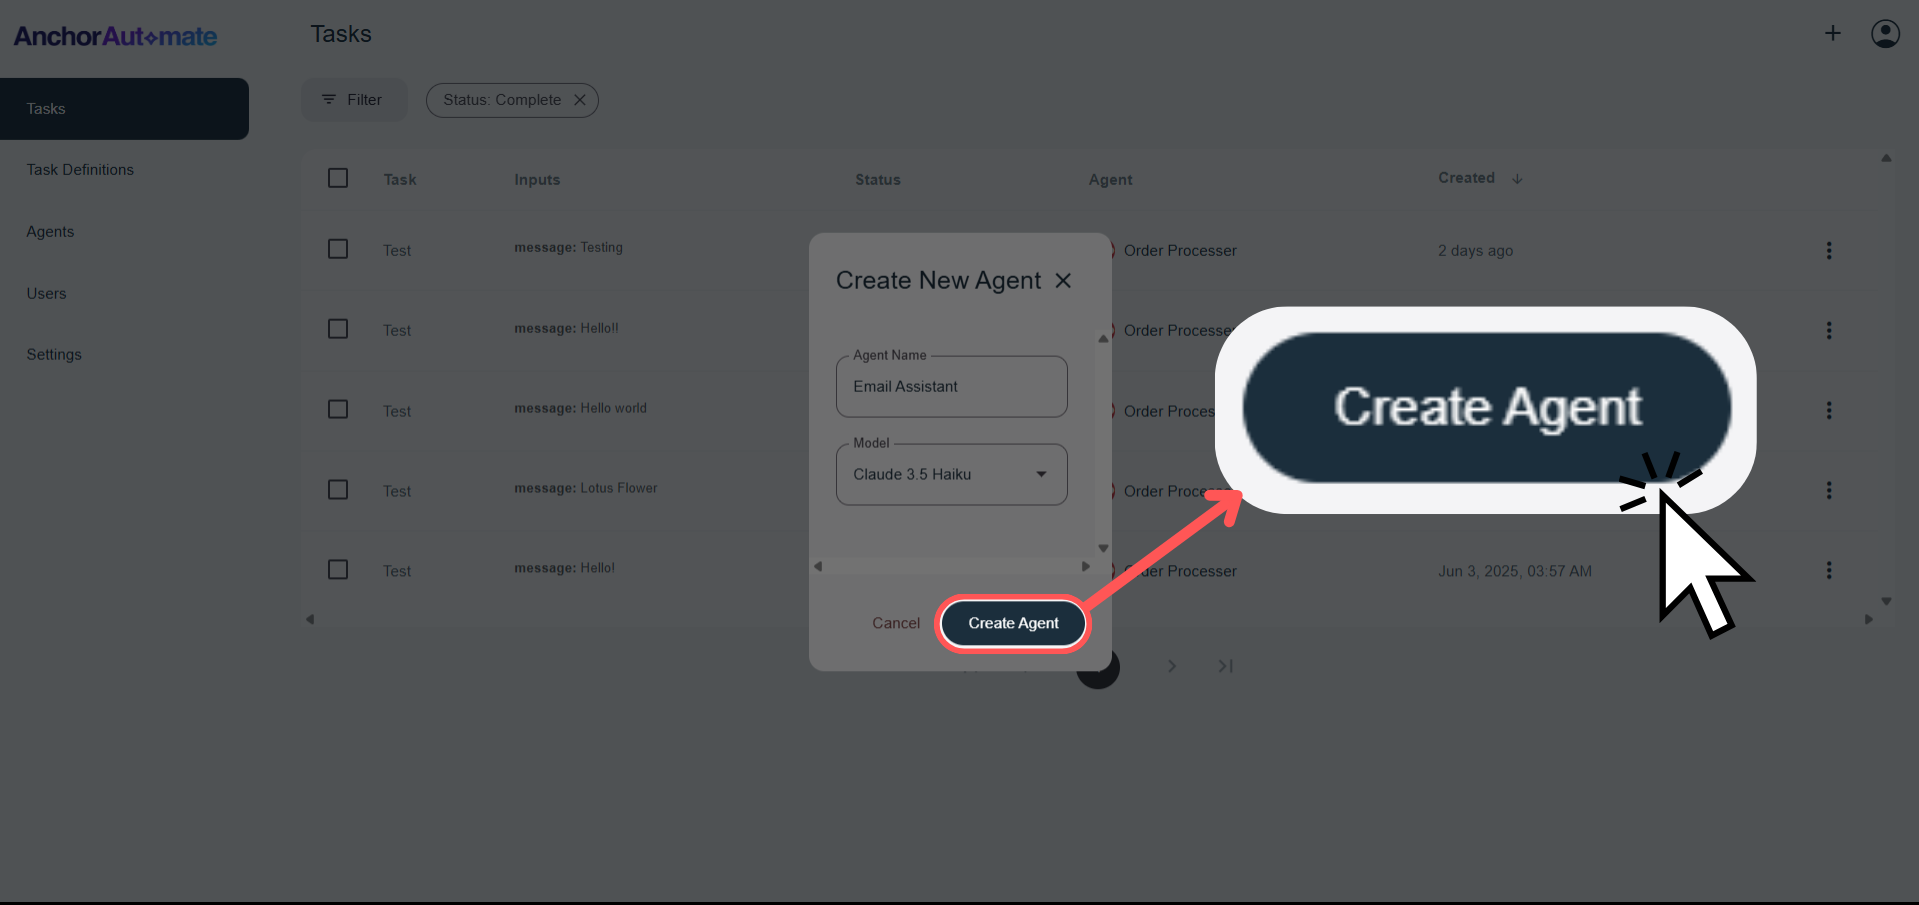
Step 4: Create the Agent
Click Create Agent. 🎉 Congratulations! You now have your very first agent ready to automate tasks.
Best Practices
Naming Conventions
- Use consistent naming across your organization
- Include the agent's primary function in the name
- Avoid generic names like "Agent 1" or "Helper"
Security Considerations
- Principle of Least Privilege – Only grant necessary permissions
- Regular Reviews – Periodically audit agent permissions and connections
- Sensitive Data – Use human approval for operations involving sensitive information
- Access Controls – Limit who can modify agent settings
Troubleshooting
Agent Not Responding
- Check that the agent is properly configured
- Verify app connections are working
- Review recent error logs
Unexpected Behavior
- Review and refine task instructions
- Check for conflicting rules or unclear guidance
- Simplify complex workflows if necessary
Performance Issues
- Monitor agent resource usage
- Consider upgrading to a higher-tier model
- Optimize task definitions for efficiency
Post-Creation Setup
Once your agent is created, you can continue setting it up by connecting apps and creating task definitions. Detailed guides for each step are available:
Need Help?
- Visit our community forum at community.anchorautomate.com
- Contact support through your dashboard
